
Ahead of Saturday’s clash between the All Blacks and Boks, CRAIG LEWIS looks at how New Zealand mix forwards and backs to lethal effect on attack.
After just three rounds of the Rugby Championship, the All Blacks stand on the brink of the title after running in 18 tries and 124 points to claim a full haul of 15 log points.
With the under-fire Springboks set to face an almighty test against New Zealand in Wellington this weekend, we take a look at some examples of just what the visitors will be up against.
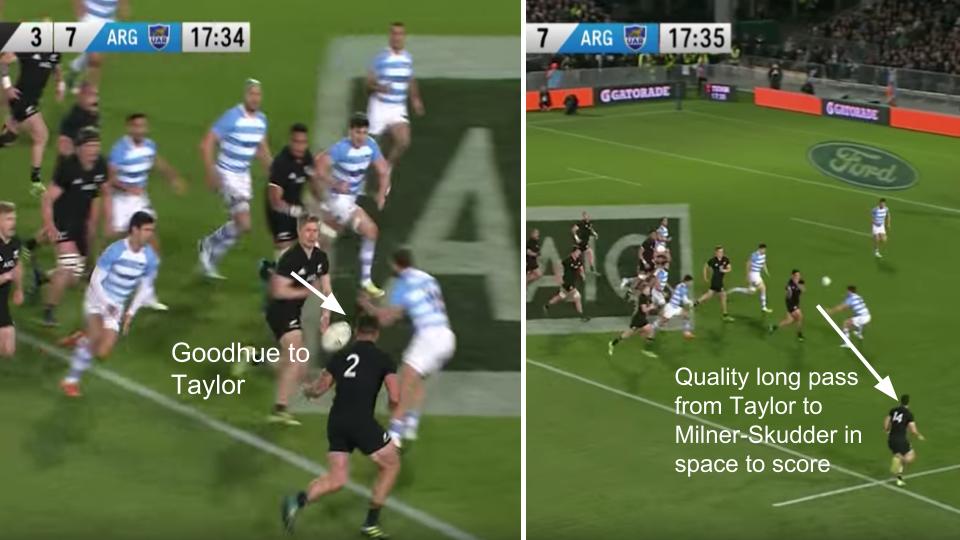
In the first example below from the All Blacks’ win over Argentina last Saturday, you can see a well-constructed move taking shape as Richie Mo’unga plays Shannon Frizell alongside two other forwards, while Damian McKenzie and Jack Goodhue lurk just behind.
The set move sees Frizell take the ball to the line just before turning his back on the defence to pop a pass to a flying Goodhue.
 With the defence sucked in, Goodhue makes a perfectly-timed pass to hooker Codie Taylor, who shows all his skills to send a superb long ball out to Nehe Milner-Skudder, who darts away to score the All Blacks’ opening try. Note in the slide below just how many Argentina would-be defenders are bunched together.
In the next example below, again Perenara sends a pinpoint pass from the base of a ruck to this time find Ben Smith at first receiver. Lying deep outside Smith, there are four All Blacks support players, while Scott Barrett and Mo’unga fold back around.
However, Smith quickly sizes up the fact that there are Argentinian forwards in front of him, and breaks clean through between hooker Augustin Creevy and flanker Marcos Kremer. Also take note in the first split-screen that Kieran Read can be spotted ranging out wide on the wing.
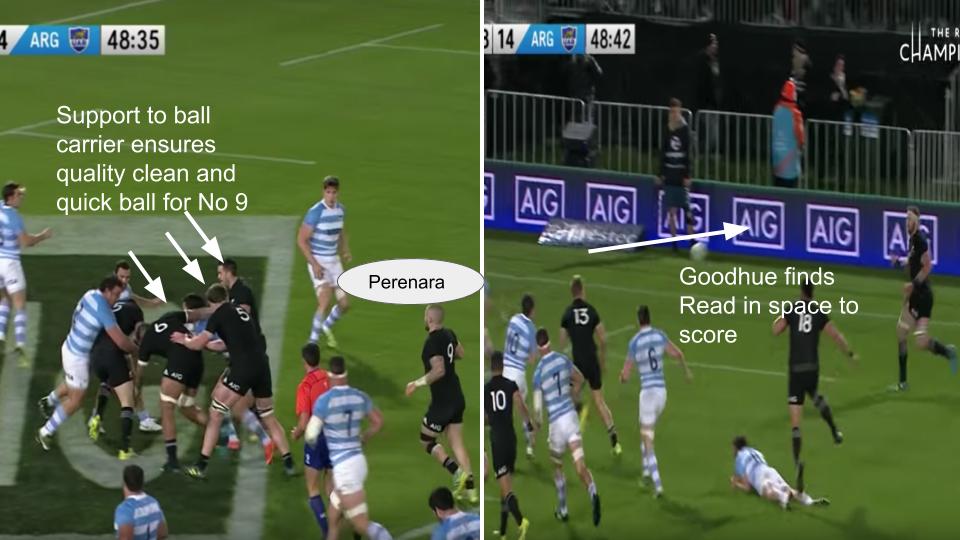
 With Smith having made a clean break, the support runners that lurked in close proximity now help ensure quick ball is generated when he eventually brings the ball to ground. In a flash, Perenara arrives and sends the ball out wide where Argentina are stretched on defence. Goodhue will find Read, who had been hanging out wide, with the No 8 going over to score.
In the lead-up to the All Blacks’ next try, Perenara will this time play replacement Anton Lienert-Brown at first receiver. Again, note how there are two forwards providing ball-carrying options, while Goodhue and Smith hang just behind.
This time, Lienert-Brown accurately spots Argentina forwards on defence ahead of him, and shoots through to make a clean break.
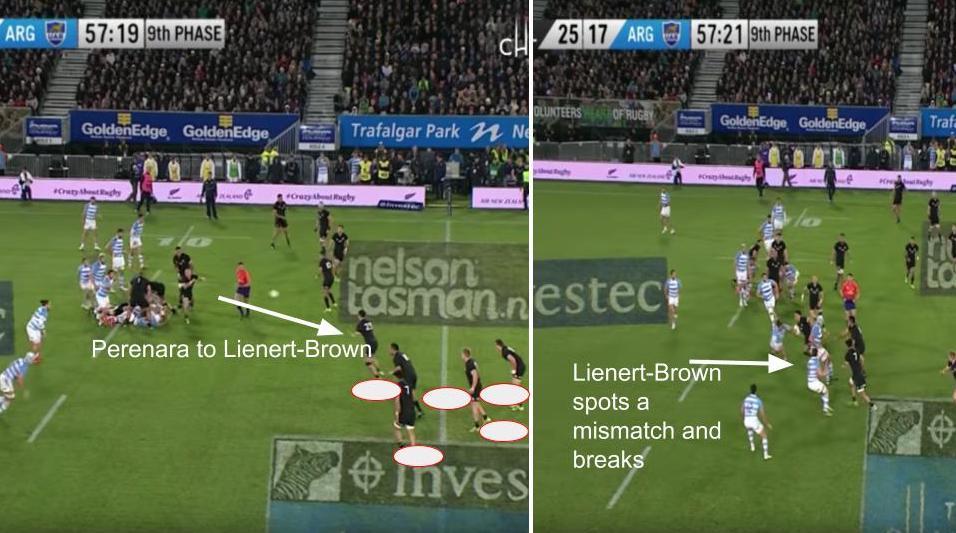
In the next clip, you can see how Ardie Savea, Goodhue and Perenara follow closely to provide options. Lienert-Brown holds on to draw the defender before putting Perenara in for a try.
In the final try-scoring example below, the All Blacks use a pod of forwards to first carry ahead, with Sam Whitelock going on to make a delicate pop pass to Ofa Tuungafasi to maintain go forward. As replacement scrumhalf Te Toiroa Tahuriorangi picks up the ball from the base of the ruck, he spots and targets some space around the fringes. 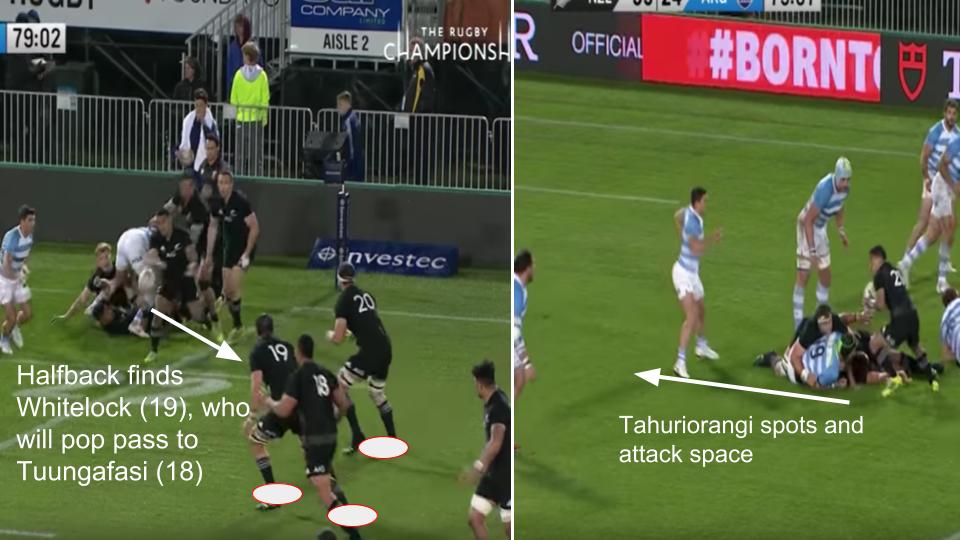
Just before taking the tackle below, Tahuriorangi makes a beautiful no-look offload to McKenzie, who comes flying in on the angle from the blindside, before also drawing two defenders and offloading in contact for Goodhue to score.

It’s worth bearing in mind that this was a new-look All Blacks side picked to play Argentina, and yet their execution, set moves and interlinking between backs and forwards highlight just why they are so difficult to stop.
With scrumhalves who boast powerful passes, the first receiver is able to dictate proceedings, while the superior conditioning of the All Blacks ensure that there are always plenty of players on their feet and in support.
In short, it shows just how hard the Boks will need to work on defence if they are to prevent the All Blacks from cutting them to pieces on attack.
Photo: Ashley Vlotman/Gallo Images/Getty Images